A-Walking: Gerrick Moor to Egton Bridge
Despite the torrential down-pour of rain that took place in the early hours of Sunday morning on the 28th July, our three SRC walks went ahead in the Esk Dale area of the North York Moors. During the day, the weather was superb - plenty of sunshine and some gentle breezes to keep us cool. The A-Walk started from the car park on the A171 near Gerrick Lane, the B-Walk set off from Scaling Dam and the C-Walk followed a circular route from Egton Bridge. All walks finished in Egton Bridge.
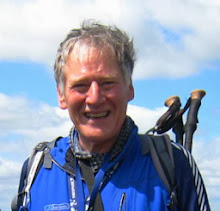
The A-Walk was led by Phil Barker - pictured below. There were five walkers in the group; the distance covered was 16.1 miles.

We left Trough House on an easterly bearing and followed Cut Road (path) across Glaisdale Moor to reach the minor road near Birk Wath Beck {NZ 729 028}. We then walked along the road in a north-easterly direction until we arrived at the trig point on Glaisdale Rigg. At this point we left the road and followed a good track in an easterly direction until we reached Glaisdale. From here, we dropped down to Carr End where we stopped for a short tea-break near Beggar's Bridge.
The final part of our route involved a pleasant walk through East Arnecliff Wood towards Delves. From here we followed a narrow minor road in a down-hill direction until we reached The Horseshoe Hotel at Egton Bridge. We crossed the River Esk using two sets of stepping stones near {NZ 801 051} in order to make our way to our coach which was waiting nearby.
Many thanks to Phil for leading the walk.
A selection of some of the photos that we took during today's walking expedition can be seen by clicking on the pink button below:
Credits:
Many thanks to Jane Thompson and Phil Barker for taking the photographs.
posted by philbee @ 08:55
0 Comments
![]()

0 Comments:
Post a Comment
Subscribe to Post Comments [Atom]
<< Home